Step 1: Cut 2 strips of paper 12 inches long by 1 inch wide. You'll want to choose heavier paper for this project. Papers that have a busy pattern work best because they hide the joining seams better.

Step 2: Start folding you paper, accordian style, until you've folded one whole strip of paper. The picture below shows you how to start this.

Step 3: Now that you are done folding the first strip of paper, it is time to start folding the 2nd strip. You'll want to make sure they join the right way. If the end fold on the first strip faces up, then take your 2nd piece, put it over that. Then continue folding the 2nd strip in the same fashion as the first.

Step 4: It's time to glue the ends together, forming an accordian circle. You'll want to use a super sticky clear adhesive for this. I use Crystal Effects from Stampin' Up!. Your regular tape runner will not work!! So join your strips together, glue & let it dry.

Step 5: While you're waiting for that to dry, you need to cut out a cardstock or thin chipboard circle. I save cardstock sheets that come with paper packs. You could even cut a circle out of a cereal box if you want. You will want to make sure your circle is smaller than your flower will be. The circle photographed below is about 1 1/2 inches in diameter.

Step 6: Glue up your circle using the same glue you used for the above steps. I put it on nice & thick so it will adhere to the folds of the flower really well. Don't put it too close to the edge or else you'll have a gluey mess to clean up :(

Step 7: Here comes the tricky part. Get your flower and start gathering it together and try to lay it "flat" (or facing upward - it's not really flat because it's an accordian, see?). This might take a few tries. Your paper will naturally want to spring back to its original shape which is in step 4. No worries. Just keep gathering & working everything to the center. Then hold it all down with your finger once everything is in place. Here's what your almost-done-flower should look like:

Step 8: Now it's time to glue the circle to the back. Carefully pick up your flower & center it on the glued circle. Again, this takes practice. When you pick up your flower, it will want to spring out of shape. I try to keep one finger on the center, and then put both hands around the sides to hold it all together. Once it's on the glued circle, you can adjust each pleat to make them an even distance from eachother. Hold your flower down while it is drying. This might take a couple of minutes. Don't let go till it's dry!!

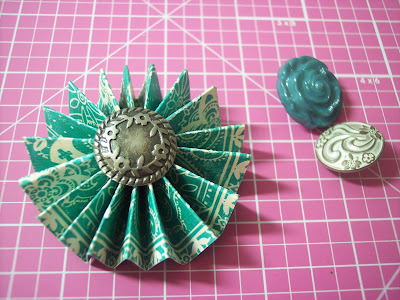
See how pretty your glued down flower is?? But it's lookin' kinda plain. Let's add something to the middle :)

Step 9: Pretty up the center of your flower with a button or brad (or whatever cute thing your heart desires). I glue on my centers using the same glue I used for the above steps.
Are you hooked?? I am! I love making these flowers. I made a few more just for fun. I hope you enjoyed my little tutorial. I can't wait to see what flowers you come up with!!
I want to see what flowers ya'll come up with. Post your lovelies in the gallery so we can all see your fabulous work!!
--Anna


Love it Anna! Thanks for sharing!
ReplyDeleteOh I love it! Thank you for sharing! I will be putting the adorable flower to use!!
ReplyDeleteYIPEEE-Thanks Anna-now I know what I was doing wrong-cant wait to try again(the right way)
ReplyDeleteLove it Anna! Will have to give this a try--thanks for sharing! :)
ReplyDeleteThese are so much fun and so cute Anna! Love this make and take! :)
ReplyDelete